Step1: Visit the website using the link https://tabschool.in/app
Step2: Login in to the Tabschool Account, Home screen will appear immediately.
The left side contains Menu bar, it has icons for different purpose.
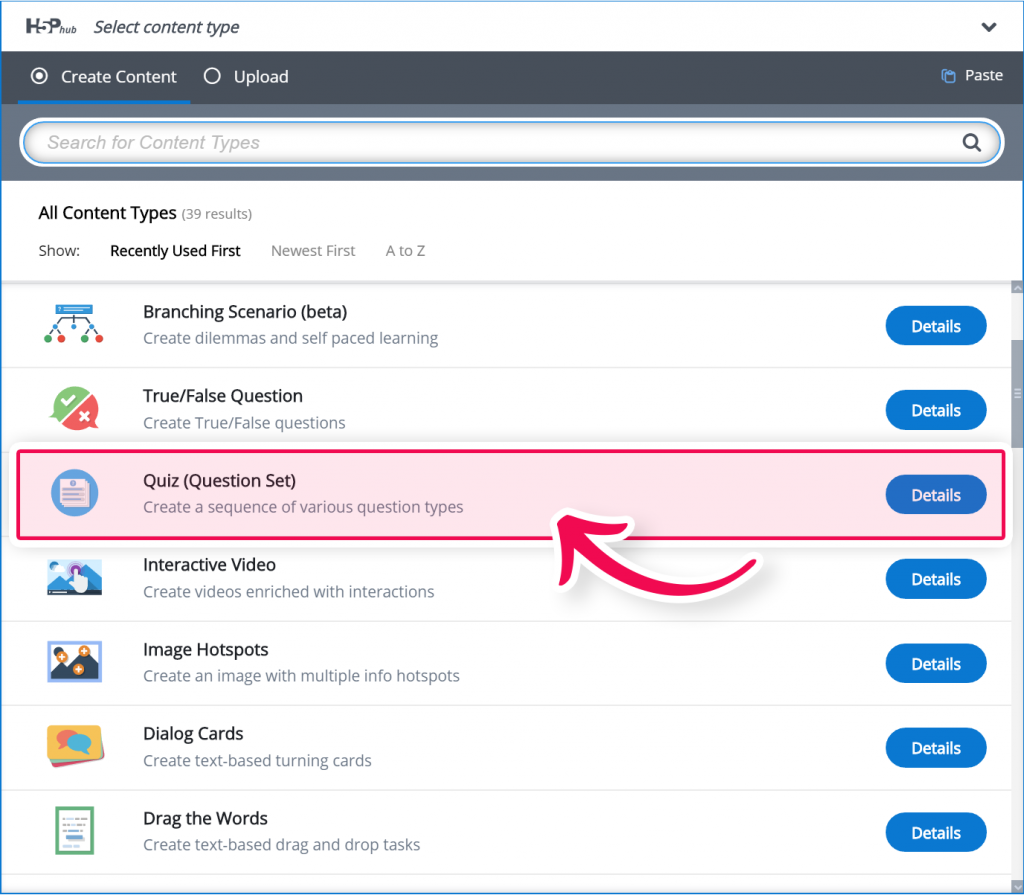
Step 3: Click on the content builder icon, given in the menu bar.
Step 4: Creating a Question set
Select the New content option.
Choose Quiz question set from the option.
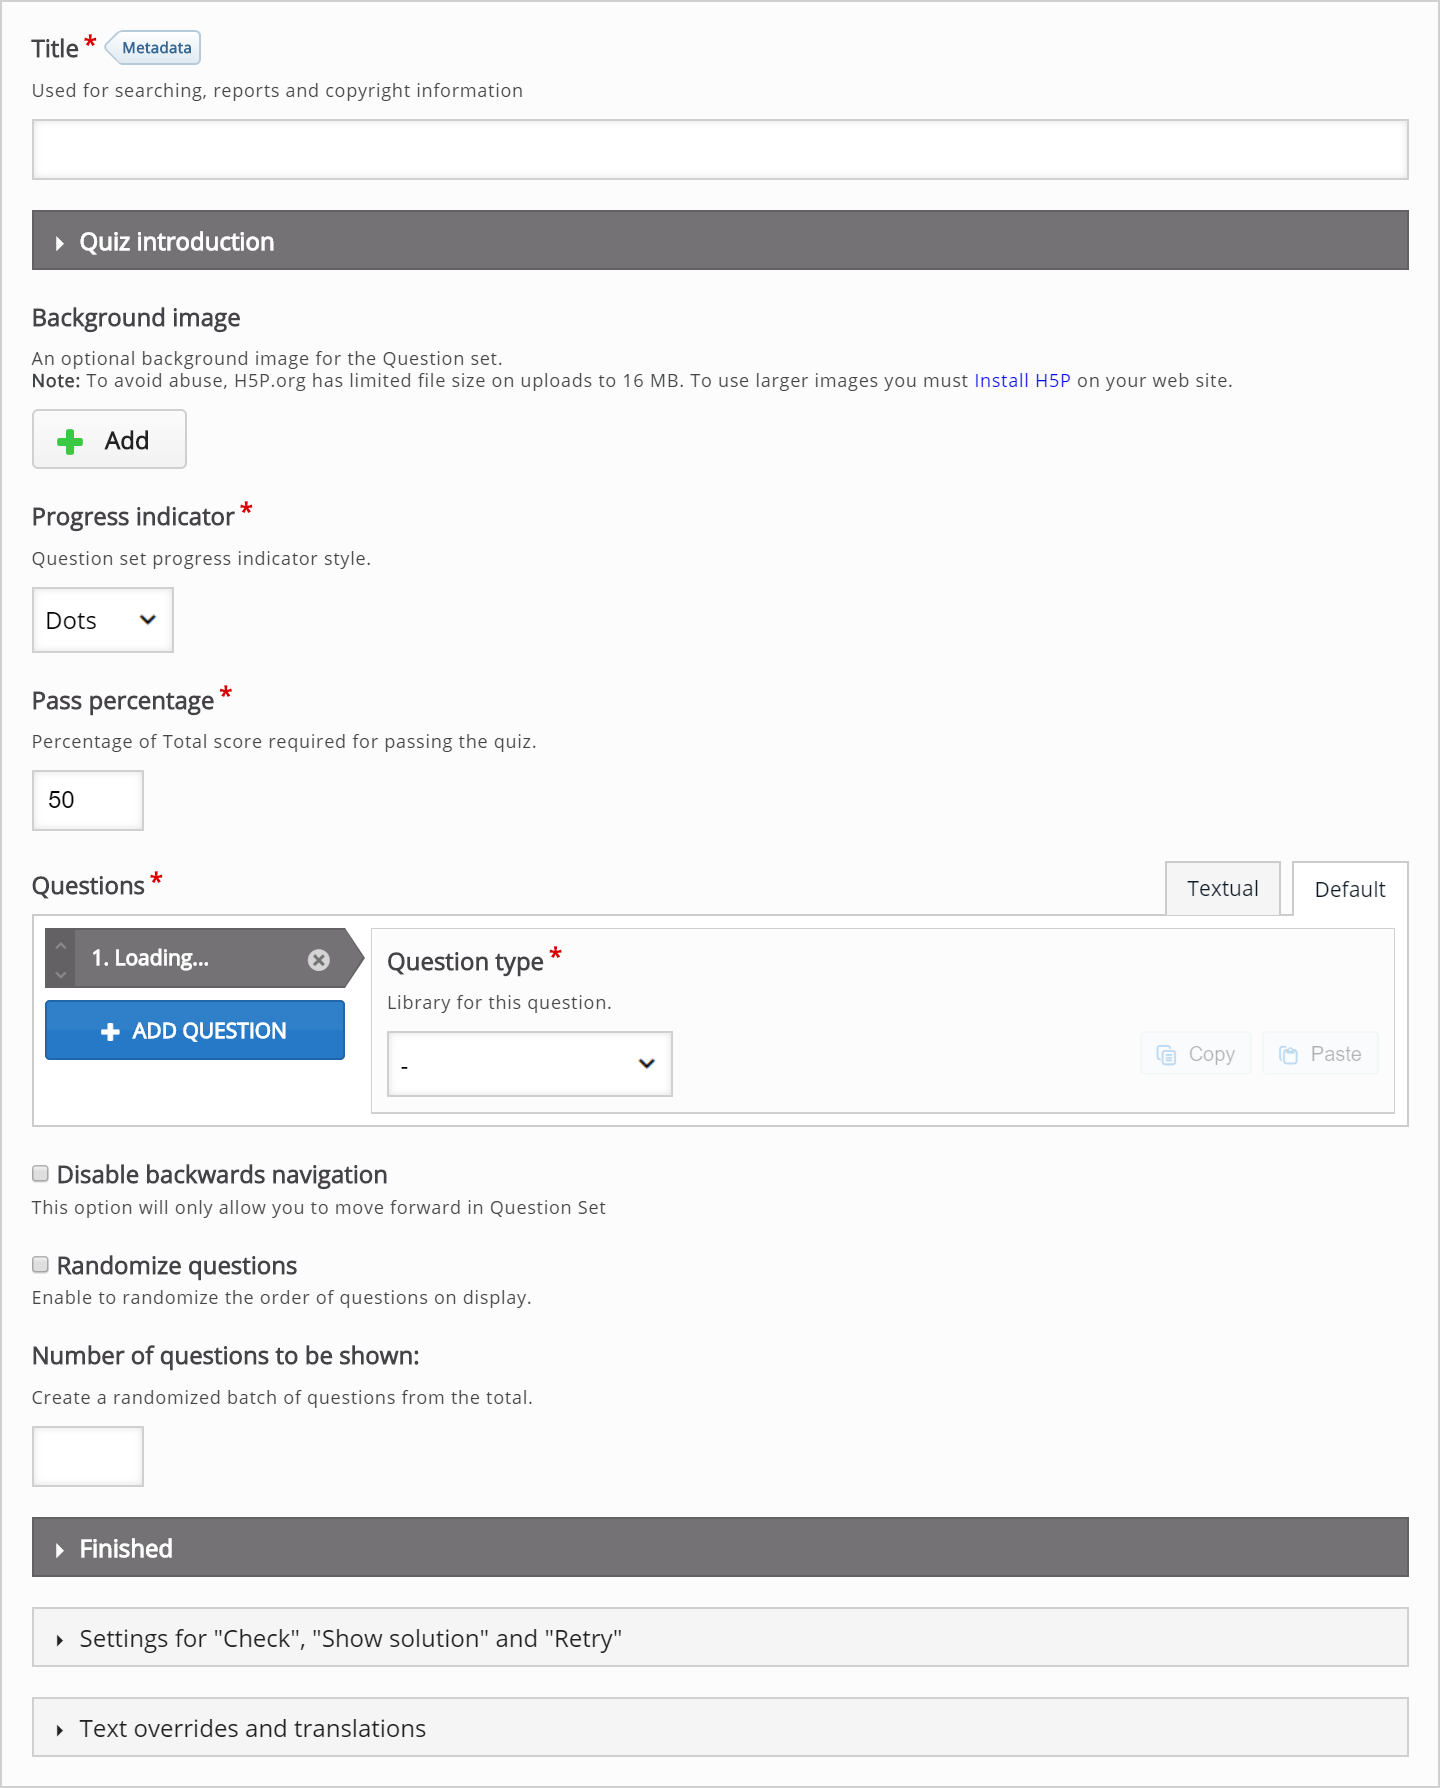
Step 5: Question set editor
The Question set editor should now appear.
The timing is limited in the exam and test option therefore you need to mention the time to start the exam and end the exam. If the time is given in the option then the test will start at the exact time and when the time will end the answers will be automatically submitted but the student cannot attempt any more questions.
Let us understand how to create the Question set content.
Step 6: Background image
There is an option to add background image displayed behind the various quiz tasks included in your Question set.
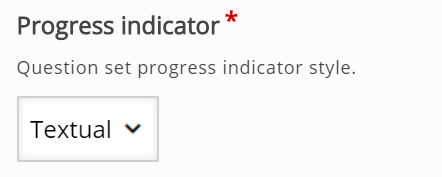
Step 7: Progress indicator
You have the option to choose between a textual indicator and dots. Let us use Textual in this tutorial:
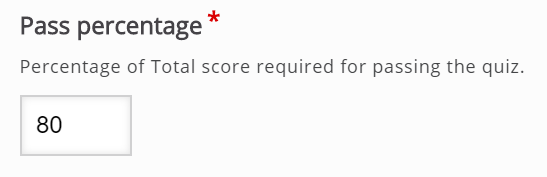
Step 8: Pass Percentage
This is the number of percentage, given to achieve in order to pass the Question set.
Step 9: Questions
Here, the actual questions are added that the Question set consists of.
- A Multiple choice question
- A Drag and drop question
- A Fill in the blanks
After the launch of the Question set, only one undefined question type is displayed below the Questions header:

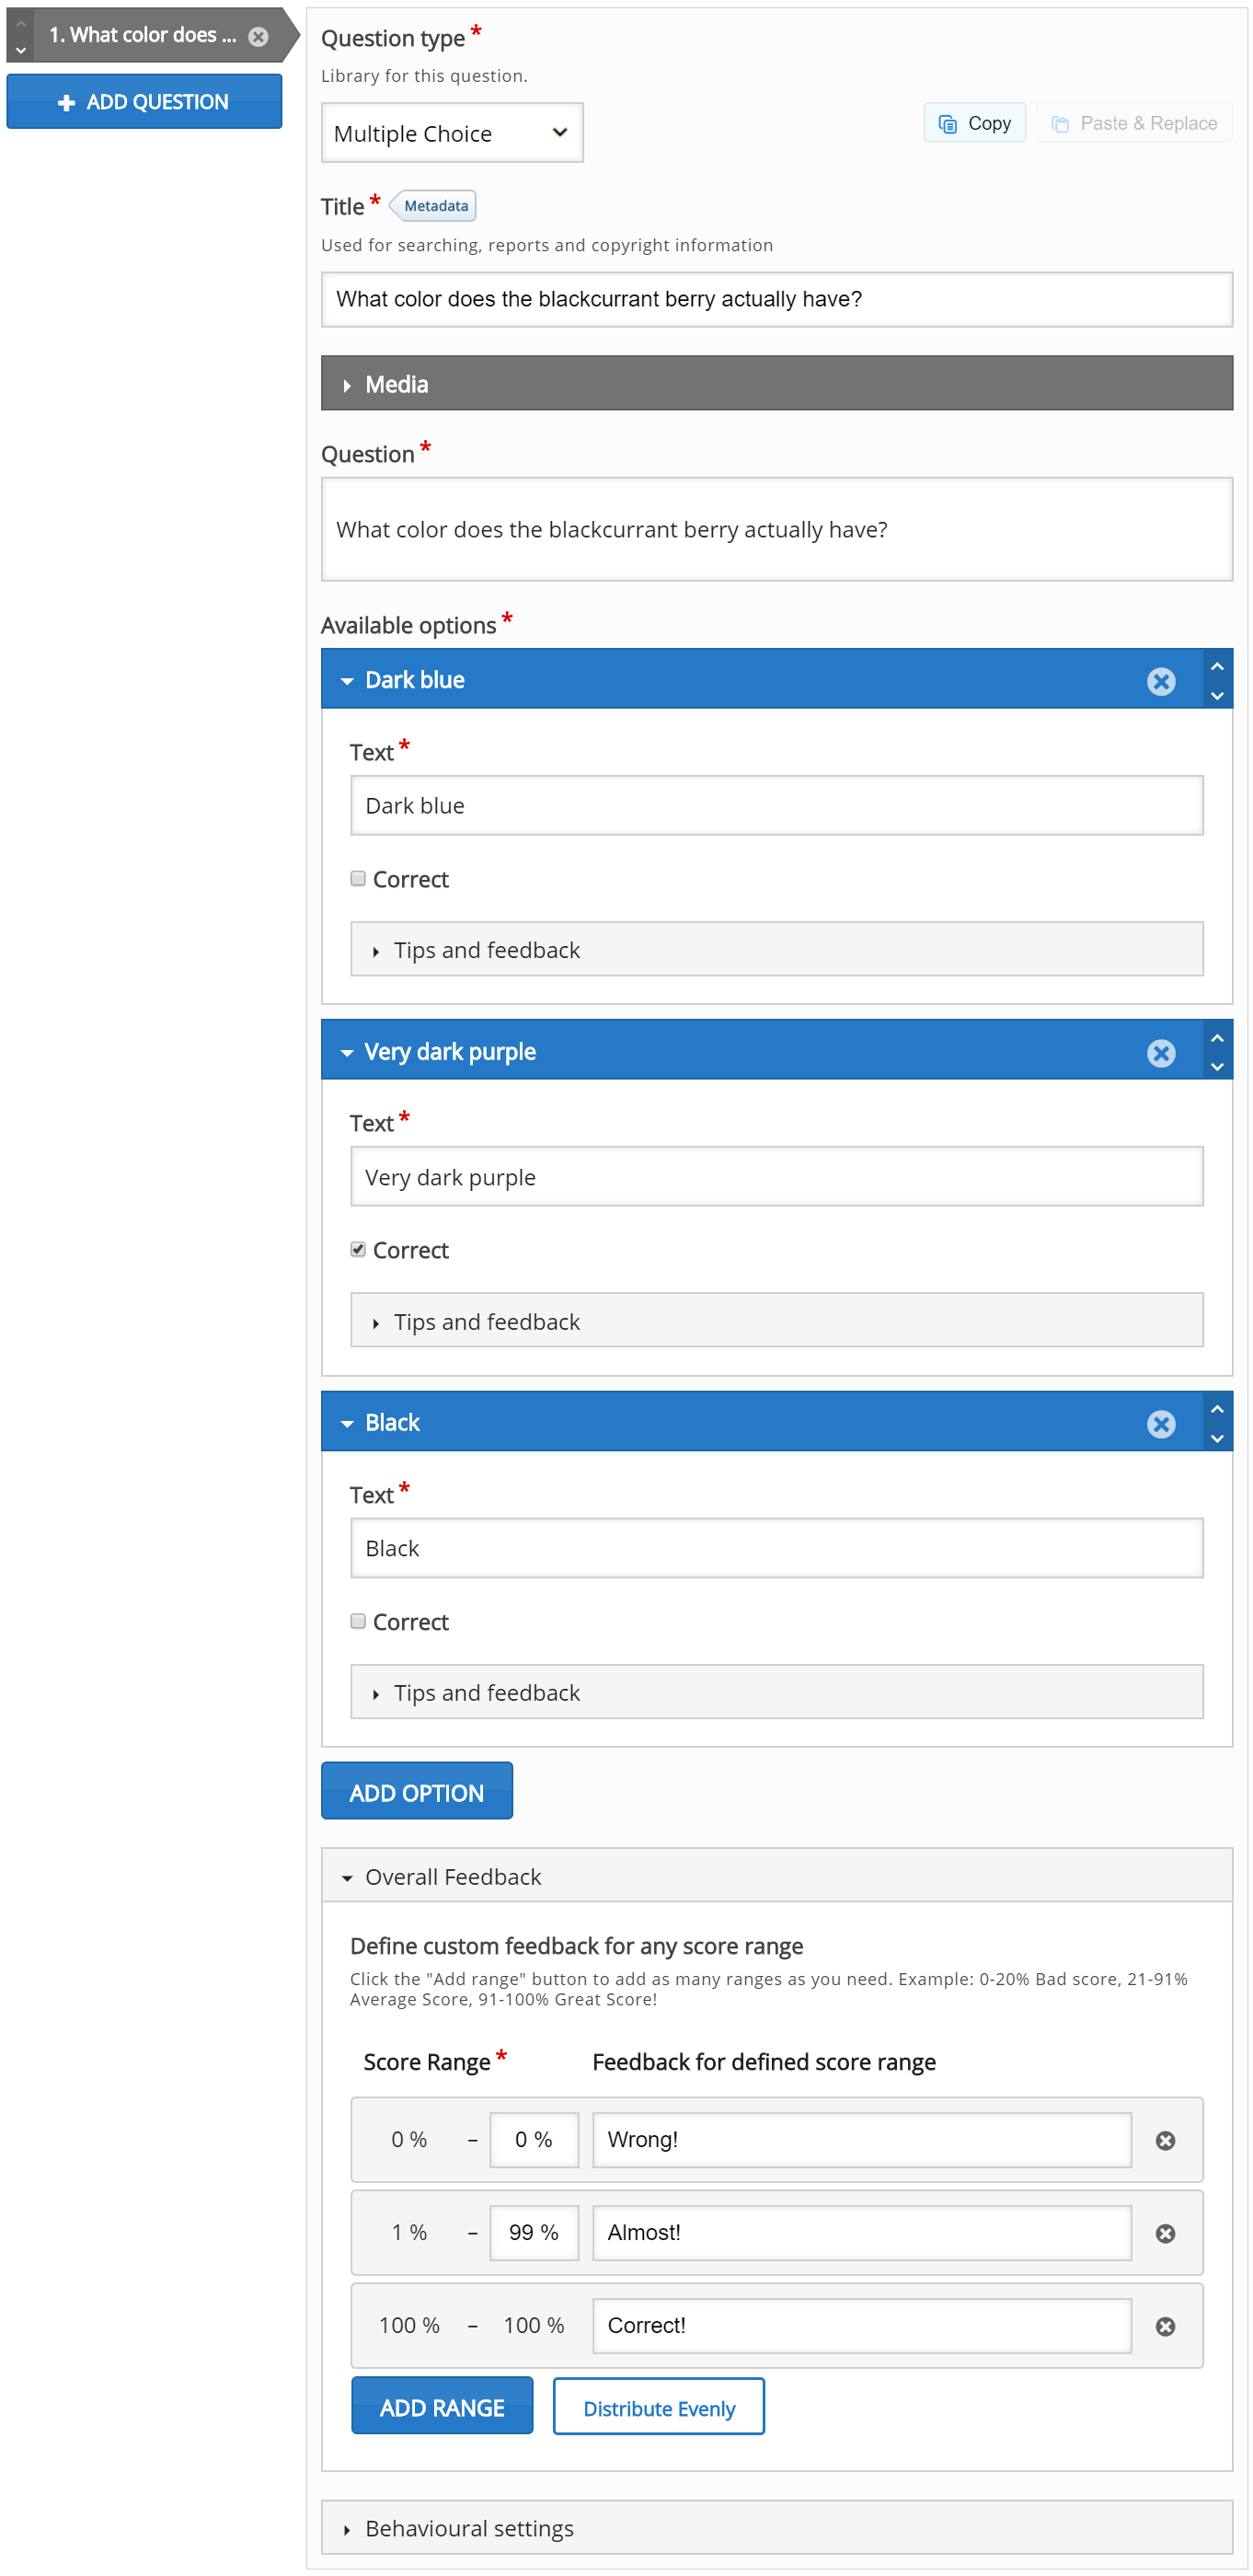
Step 10: Add multiple choice question
In the Question type dropdown, select a multiple choice question. This will load the multiple choice question editor:

The exact same content should be added as in the multiple choice question tutorial.
Step 11: Add Drag and drop question
Click on the Add question option to add another question to the Question set.
Let us take Drag and drop question from the dropdown menu.
Mention the exact same content as in the Drag and drop question tutorial.
After adding content to the Drag and drop question the screen will appear like this:
![]()
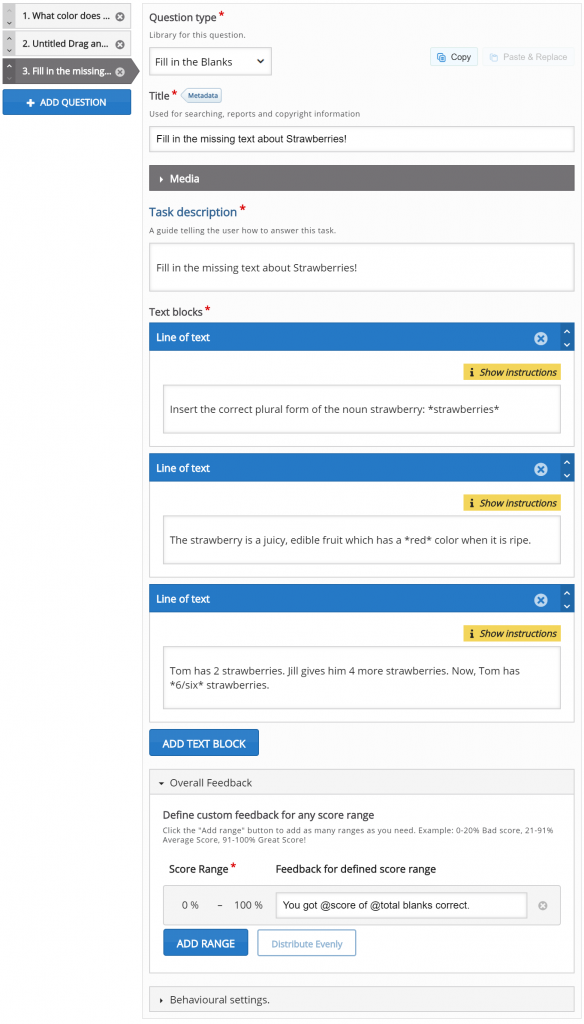
Step 12: Add Fill in the blanks question
Click on the Add question button to add another question to the Question set.
Choose the Fill in the blanks questions type from the dropdown menu.
Mention all the exact same content as in the Fill in the blanks tutorial.
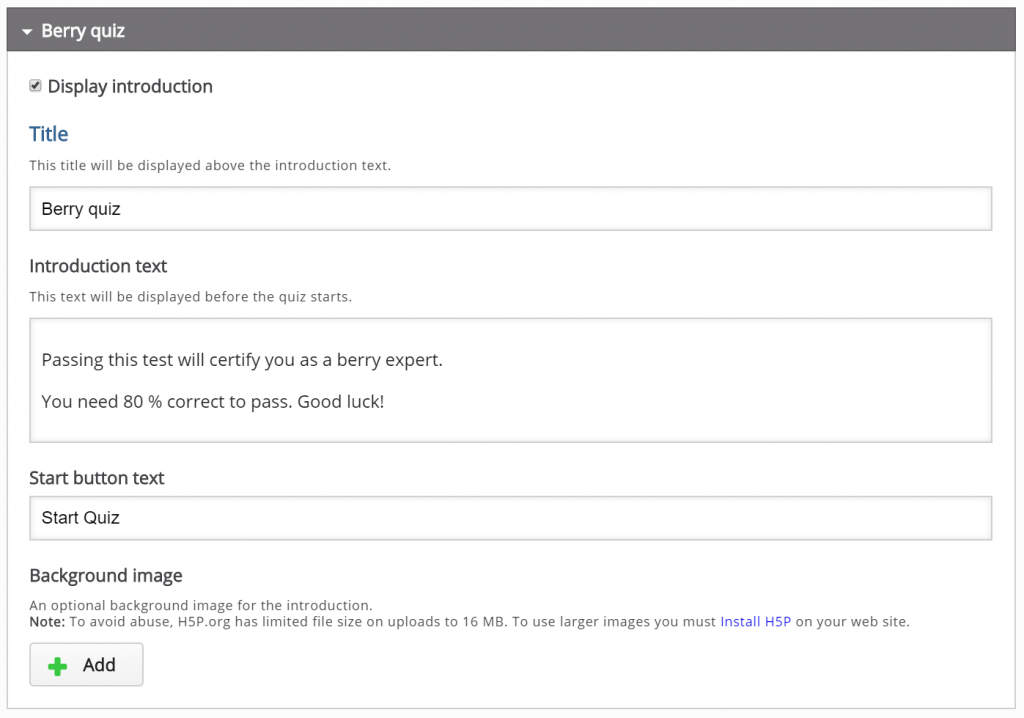
Step 13: Quiz introduction
When you will click Display introduction checkbox, the learner is shown an Introduction text and must “enter” a Start quiz button to start solving the Question set.
Step 14: Quiz finished: Your result
Under the Quiz finished: Your result: here you have options related to how the quiz results are shown to the learner at the end of the Question set.
You will also find several text fields where you have all the freedom to customize or adapt the text being used according to your own choice.
Keep in mind that display result checkbox is already checked, as we want the learners to evaluate their own performance:

In the end of the field, you also have the access to choose to Display video before quiz results. Video clip can be uploaded which is shown to the learner after completing the Question set, but before the results are displayed. You have thee privilege to choose to display one video clip if the learner passes the Question set, and another video clip if the learner fails.